

While my husband says I’m an addict, I say I love to be on Twitter as much as the next person (tweet me!). Since I can’t always be live on Twitter, I’ve signed up for HootSuite to help me get my message out even when I’m not online.
It’s easy to schedule tweets using HootSuite In just 6 quick steps you’ll be on your way!
Step 1
From HootSuite.com sign up using your Twitter account.
Step 2
Authorize HootSuite to access your Twitter account (needed to schedule tweets)

Step 3
You do need to enter an email to complete the HootSuite registration (no credit card information is required though!).

Step 4
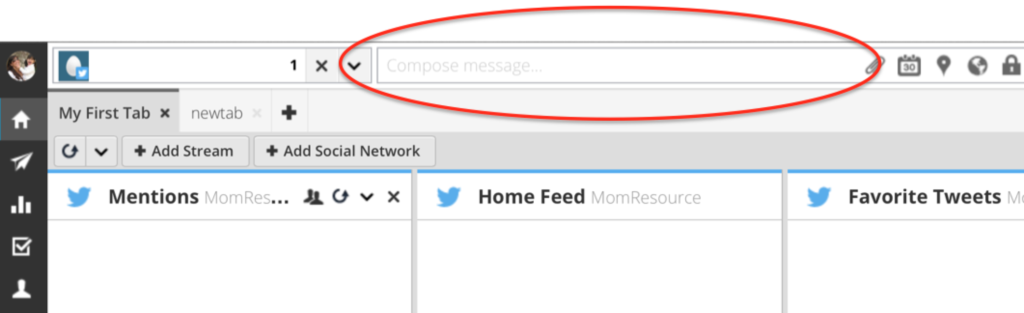
Next you will see the “Compose Message…” field at the top of the dashboard.
Step 5
Type your message and click “Scheduling” (calendar picture).

Step 6
Choose the date & time you want the message to be sent & then click “Schedule”.

You can also choose to automatically schedule your tweets by changing AutoSchedule to ON.
AutoSchedule selects the best time to publish content based on three factors:
- High engagement time periods.
- Already scheduled content.
- Customized (user defined) settings; messages per day, time period and days applicable.
That’s it, you’re done. To view, edit or delete your scheduled tweet, click on the paper airplane (Publisher) in the left sidebar.

Free, quick & easy to get started with HootSuite.com now.
Latest posts by Saira Perl (see all)
- Spring Bingo Printable – 200 Game Cards - January 1
- Valentine’s Day Bingo – Printable Bingo Cards - December 2
- Alice in Wonderland Bingo For Large Groups – 100 Game Cards - November 10